Saturday, November 8, 2008

Zoom Lens


A Zoom Lens is a camera accessory that allows a photographer to take close-up shots of his subjects. Similar to a telephoto lens, the zoom lens can magnify a subject anywhere from two to up to twelve times its original size.

While a zoom lens can be used at close range for macro photography shots, it may also be used by a photographer to capture shots of subjects at a far distance from the camera. Using the zoom lens for distant subjects can allow the photographer to take pictures of subjects or scenes that he can’t access for security reasons or because the action of the scene is too dangers.

For this reason, zoom lenses are commonly used in nature photography, as well as in undercover or spy work. For instance, a photographer on safari will want to use a zoom lens to snap shots of a lion feeding. Another photographer may also use a zoom lens to capture shots of racecars driving or of the president and his entourage. In each of these examples, because the photographer can’t get close to his subject, a zoom lens is necessary to clearly capturing the image.

Digital SLR Cameras


SLR, which stands for single-lens reflex, refers to a type of camera that employs a rotating mirror (either a pentaprism or a pentamirror) that reflects the image that comes through the lens onto a focusing screen. From the mirror’s reflection, the images then appears in the camera’s eyepiece. The image only reaches the film after the focal plane shutter opens (when the photographer takes the shot).

Produced in 1935, the GOMZ sport was first version of the SLR camera to be made. Different models flourished throughout the WWII era that included improvements in the viewfinder’s orientation and the camera’s internal mirrors. Since the 1970s, amateur and professional photographers alike have been using SLR cameras.

Over the years as photographic technology improved, retailers produced SLR cameras that were equipped with LCD screens, improved lenses and microcomputers. Today, camera manufacturers such as Canon and Nikon have made digital SLR cameras available.

While digital SLR cameras give the photographer the advantage of viewing the scene without parallax distortion (apparent movement of fixed objects when the photographer changes position), they do prevent the photographer from seeing his shot at the moment the picture is taken.

Monday, November 3, 2008

Choosing Camera Lenses


Choosing camera lenses demands both knowledge of and experience with different types of camera lenses. Although knowing which lenses work best in given conditions is important, a photographer also chooses a particular lens to produce a specific photographic effect. Light, composition and subject matter of a scene all influence photographers’ choices of lenses.
Wide-Angle LensAlthough some will take landscape shots with telephoto lenses, most photographers opt for the wide-angle lens. Because a wide-angle lens has a wider field of vision than the human eye, it can take in more of a topographical expanse. Consequently, the wide-angle lens is one of the preferred landscape camera lenses.
A wide-angle lens can focus on the foreground and background simultaneously, another ability that the human eye lacks. Wide-angle camera lenses are best for large, dynamic landscapes where background and foreground both catch the eye’s attention. However, a photographer should refrain from using a wide-angle lens if he wants to focus in on the details of a single, distinct subject.
Zoom LensA zoom lens allows the photographer to widen or shorten the lens’ focal length to increase or decrease the magnification of the subject. This feature makes the zoom lens a popular camera accessory in many types of photography, ranging from landscape to portrait photography. However, because zoom lenses have small apertures (or lens openings), they are not well suited to taking pictures in low-light conditions.
Zoom lenses have replaced the fixed focal length camera lens in most camera models, especially with the advent of digital cameras. When choosing camera lenses, bear in mind that an optical zoom lens and a digital zoom lens are different.
While an optical zoom lens magnifies the image, a digital zoom lens crops the image after the maximum zoom is reached. Essentially a digital zoom enlarges and crops the image seen in the viewfinder instead of magnifying the subject. This digital enlargement results in lower resolution and, therefore, a poorer quality image.
When choosing camera lenses with zoom capabilities, photographers should look for high optical zoom capabilities rather than being deceived by claims about digital zoom capability. Pictures are of much better quality with an optical zoom lens.
Telephoto LensThe difference between a zoom lens and a telephoto lens is subtle. A zoom lens enlarges and magnifies the image. In contrast, a telephoto lens brings the subject “closer” to the photographer, reducing the distance between objects in the photograph and the camera’s lens. This allows a telephoto lens to show greater detail than the human eye could see at the same distance.
Fixed-Focal Length Camera LensA fixed-focal length camera lens is a permanent, non-adjustable lens found on some low to mid-range quality cameras. Often (but not always) doubling as a wide-angle lens, fixed-focal lenses tend to work well for low-light photos.
A fixed-focal length lens can do wonders for beginning photographers by helping them learn the art of photography. Without zoom capabilities, the photographer must give more thought to basic photography composition to produce good quality shots. Consequently, a budding photographer may learn the basics of good photography faster if by choosing a fixed-focal length lens.
Fixed-focal length camera lenses are less common than they once were, in part because most mid-range digital cameras now have built-in zoom lenses.
The Macro LensA macro lens is used to take extreme close ups of objects. Its short focal length allows the photographer to take pictures at close distances without distortions. The resulting image is as large as, or larger, than the original subject.
Choosing a macro lens has been complicated by digital camera settings. Originally, a macro lens was an extension tube for the camera lens. However, today’s digital cameras often have a macro setting. Although the setting replaces the traditional lens, it stillproduces the same effect as the previous macro lenses.
Macro lenses or macro settings are best used for magnifying the details of already smallobjects. For example, a photographer can use his macro setting to photograph ripples in water, the dew on a flower petal or the crevices of a rock.
Fisheye LensFisheye camera lenses distort the subject image, producing photos with curved and convex appearances. The fisheye lens was first developed for astronomy photography that seeks to capture as wide a range of sky as possible.
Today, the fisheye lens has become popular with landscape photographers, as the lens distortion curves horizons and hints at the earth’s curve. A portrait of a person taken with a fisheye lens has the distortion similar to what’s seen when looking through a door’speephole.
Front of Lens AccessoriesChoosing among different camera lenses isn’t an issue for most mid-range cameras because they already have built-in lenses that cannot be changed. While single lens reflex (SLR) cameras have interchangeable lenses, their steeper prices tend to make them a tool for professionals or serious amateur photographers.
For the hobbyist who doesn’t have an SLR camera, front of lens accessories that mimic the effects of certain lenses are available. A front of lens accessory is a disc that clips onto the front of a camera lens to provide specific effects. While some front of lens accessories filter out light, others mimic the effect of a wide-angle or fisheye lens.
Photos taken with a lens clip on accessory lack the quality of those taken with camera lenses designed for the same effect. As choosing a lens is not possible with many cameras, front of lens accessories increase the average photographer’s options.

Infrared Characteristics


Infrared radiation has a longer wavelength (lower frequency) and lower energy than light from the visual spectrum. The spectral range from 700 to 1350 nanometers can be photographed but conventional cameras are limited to the range of approximately 700 to 925 nanometers. Infrared beyond the 1350 nanometer range can be imaged but only with special non-photographic equipment. Georg Dittie's Thermal Infrared & Thermography web page is a useful introduction to imaging in the infrared region beyond the grasp of conventional photography. The infrared region between 1000 to 1350 nanometers requires special photographic equipment and special order film. Infrared spectrum in the range from 700 to 925 is the region that is most accessible to conventional photography.
Most 35mm, 120 (6cm)and sheet film cameras can be used for infrared photography in the range of spectrum from 700 to 925 nanometers. A few of the newer plastic body cameras may not be completely opaque to infrared.
You can easily test your equipment to see if it is completely suitable for infrared photography. Load a roll of infrared film into the camera and fire off several exposures at high shutter speed and small f-stop, with lens cap in place and indoors. If you open the fresh film container and load the film into the camera in total darkness you will have a completely unfogged roll making the test results easier to interpret. This will leave blank, unfogged film in the exposure chamber of the camera. Now place the camera in full 10 am to 2 pm April to September sunlight in several orientations for about 20 minutes in each (lens cap on if it is a rangefinder!). Process the film to normal or slightly greater than normal gamma. If the film is fogged, the equipment is leaking infrared radiation. Inexpensive, older model 35mm cameras usually make good infrared cameras if your plastic camera body leaks infrared.
The same test works for sheet film cameras and film holders. Sheet film holders are particularly troublesome with infrared photography and should be kept in the dark as much as possible. Some film holder bodies and dark slides may not be opaque to infrared. The dark slide, light trap may also leak infrared. Some view camera bellows may leak infrared. The safest solution is to keep direct sun off of the camera and film holders.
Since the range of infrared spectrum beyond 1350 nanometers is thermal radiation and imaging here involves recording heat patterns, infrared film tends to be especially sensitive to heat and age fogging. The further the film's sensitivity extends into the infrared region, the more apt it is to fog easily. Store infrared film in a cool place and shoot fresh film whenever possible. Process infrared film as soon after it is exposed as possible to minimize subsequent fogging.
Most photographic lenses are designed so that they have the same focal length for all colors of the visual spectrum. They are not usually designed to correct focus for infrared light. On many lenses there will be a red line or dot near the focus index. This is the correction factor for infrared. You focus visually, then move whatever is opposite the focus index to the infrared mark. This adjusts the lens away from the film by about 1/400th of the focal length (1/4 percent) and brings the infrared image into sharp focus at the film plane.
Most infrared films are sensitive to light from the visual spectrum in addition to infrared radiation. Various sharp cutting color filters can be used to limit imaging radiation to the infrared region. The following table gives mid and maximum usefully recordable wavelengths for several commonly available infrared films.

Sports Photography


We have all at one time or another been captivated by sports images. It may be Kirk Gibson's World Series Homerun, and the image of him running the bases, overcoming the pain he was in or an image of high flying Michael Jordan slam dunking a basketball with his tongue out. We have all been captured in the moment of human drama. We all like a good action photo and, in particular, if your kids play sports, you want to remember them in their toils.
Quality sports shots are somewhat difficult to come by. Most people have limited access to events to photograph them. The further away you are from the event, the harder it becomes to capture the event in a pleasing manner. Sports are an event where crowd control is important, not only for the crowd's safety, but for the players also. There is nothing more frightening than to be on the sidelines of a football game, focused on a play in the field, when out of the blue a 250 pound line backer drives a player into your legs or a foul ball comes crashing at your $8,000 lens!
Location, Location, Location!
You can only photograph things you can see. The closer you are to someone, the better you can see them. Sports are no different. You have to get as close to what you are shooting as you can. Typically, for a photographer with a press pass, you can get to the sidelines or other similar locations. You generally will not be permitted on the playing field. Depending on the sport, you most likely will be limited to designated locations. For instance, at most Division I football games, the media cannot shoot between the two 35 yard markers. For most people, the situation is even worse. You probably don't have press access and are stuck in the stands for your shots. Get as close a possible. Even if you make it to the sidelines, you will be jostling for space with many other photographers, both still and video who have worked hard to get there and have the same job to do that you have.
You also have to be familiar with the sport to be able to capture the moment. This means knowing where to position yourself for the best action. This is critical because of angular momentum that will be discussed in the section on freezing action. Not only does it matter with the subject, but the background. Look at what is going to be behind your subject. While we will try to minimize the impact that a background has, it will still be unavoidable. So you need to position your self where the background is the most pleasing.
The Decisive Moment
Sports and Action photography is all about timing. Its about reacting. Its about being in the right place at the right time and its about execute. These are all qualities of the athlete and those of the photographer as well. Each sport has predictable and unpredictable moments. Under "Knowing your Sport", you will learn about these moments for individual sports. For instance, in basketball, you will have opportunities to photograph layups, jump shots, free throws, etc. Understanding the timing of these predictable actions allows you to capture the peak moment, when the action is most dramatic.
By knowing these moments you can anticipate the action. This helps in two ways, one it helps you with focus which will be discussed in a later segment, and secondly it helps you snap the shutter at the right time. The saying goes "If you see the action you missed it." This basically means if you wait for the soccer player to head the ball then press the shutter release, the ball most likely will be sailing out of the frame. You have to push the button before the action so that the mirror has time to flip out of the way and the shutter open and close. There is a delay between the image hitting your optical nerve and the shutter closing. You have to, through experience, learn what that time is and adjust for it.
Required Equipment
Most sports are shot on 35mm cameras because of their portability. While some photographers have captured great sports moments with other format cameras, we will concentrate our efforts on the 35mm arena which is the most commonly used gear.
"Its not the equipment but the photographer who makes the picture" is generally a true statement. However with sports and action photography, having the wrong equipment means not getting the shots you want or need. This relates back to the section on location. The further away, the longer the lens is needed to capture the same image in the frame. Different sports require different lens lengths. For instance, basketball is generally shot from the baseline or sideline near the baseline. You generally can get good results with an 85mm lens in this situation. However, by the time the players are at mid court, you need a 135mm to capture them. If they are playing under the far goal, a 200-300mm lens is needed to fill the frame well, yet for shooting a soccer game, a 300-400mm lens is needed for just about anything useful.
Generally, for a 35mm camera, each 100mm in lens focal length gets you about 10 yards (9 meters) in coverage. This coverage means that on a vertical format photo, a normal human will fill the frame fairly well. Thus, if you are shooting American Football from the 30 yard line with a 300mm lens, you will be able to get tight shots in an arc from the goal line to mid-field to the other 40 yard marker. As players get closer, your lens may be too long. Many photographers will carry two bodies with two different length lenses for this reason.
Lens speed is also a critical factor. The faster the lens, the faster the shutter speed you can use, which as the lens grows longer, this becomes even more important. This will be covered in the freezing action section in more depth. If you look at the sidelines of any Division 1 college football game or an NFL football game, you will see people with really big lenses. These range from 300mm to 600mm or longer and even then, they may have a 1.4X converter or 2X converter on. You need fast shutter speeds to freeze action with long lenses. Every F Stop you give up requires a faster film or less freezing potential.
Most consumer grade long lenses and zooms have variable apertures, but most are F5.6 at the long end of the lens. F5.6 is good for outdoor day time shots, but becomes very inhibiting for night games and indoor action. Most people use lenses that are F2.8 or faster. These lenses are very expensive. A 400mm F2.8 sells for over $8000 US. They are also very heavy and bulky. Using a monopod is a life saver with these big lenses.

Tuesday, October 28, 2008

Underwater Photography Primer


Underwater photography combines the challenges of (1) trying to make an aesthetic statement that hasn't been made by thousands of photographers who've dedicated decades of their life to the craft, with (2) trying to stay alive.
The easiest way
Get into submarine. Get out camera. Point. Shoot. Here are some examples from a 800' dive in the Cayman Islands.

The second easiest way
Snorkeling is much simpler than SCUBA diving. The key to snorkeling is to remember that the human body will always float. It just doesn't float high enough that you can breathe easily. However, if you add a few inches of extension to your mouth, your natural floating position will be more than sufficient for breathing. You can thus stay in the water for 8 hours without exerting any energy and wait for interesting subjects to drift or swim underneath.
If you're staying near the surface, you don't need a camera that can handle the pressure of deep water. A compact digital camera that has been augmented for snorkeling will work fine. Typically these cameras are specified waterproof to 10' but will work a little deeper as well. A good example is the Olympus Stylus 720SW, $320.
How did it work in the old film days? If you can find a Nikon Action Touch, you might be surprised at how good it was. This camera has a very high quality 35/2.8 lens and autofocus above water. Underwater, you set the subject distance with a convenient dial. There is a nice big switch that turns the built-in flash on or off.
The Action Touch sold for about $150 in the late 1980s, after which Nikon took it off the market and no company ever made a similar camera. The Japanese concluded that nobody is intelligent enough to focus a camera manually. All the cheap underwater cameras introduced after the Action Touch were fixed focus underwater and came with lower quality lenses.
Most film photographers would use slide film despite its attendant narrow exposure tolerance. This may have been because prints can never convey the drama and brilliant colors of the underwater world.
Here are some snapshots from an old Nikon Action Touch:

Note that an "underwater-lite" camera ends up being a great camera for rafting, kayaking, heavy rain, or any other time when you need a high quality waterproof camera but don't need high pressure resistance.
The bad thing about snorkeling is that nearly all of your photos will end up having a "looking down" perspective. Here are a couple from Hawaii (taken with the Nikonos V, described below):
The hard (case) way
Strap some tanks, ideally filled with Nitrox, on your back and dive. Many compact digital cameras, notably the popular Canon line, are marketed with accessory underwater housings. These rigid plastic cases typically cost around $160 and are designed for use at all recreational SCUBA depths, i.e., down to 130' underwater. A housed camera is never as easy to use as a camera designed specifically for use underwater, so if you are mostly going to be using a camera at snorkel depths, you are better off with a camera from the preceding section.
The hard way
What if a compact digital camera is not an adequate tool for the job? You can put any standard camera into a plastic bag. A plastic bag?!? Not just any plastic bag. A thick German plastic bag made by ewa-marine with a metal screw-down zip-loc top. These ewa guys make plastic bags for cameras of all sizes with various combinations of lenses and flashes.
We have tested some ewa-marine bags here at photo.net. To our amazement, they did not leak. However, we were never been able to use them successfully. The last time we tried the ewa bag was on a liveaboard trip to the Great Barrier Reef. The bag was stuffed with a Nikon 8008, SB-24 flash, and 60mm macro lens. As soon as I got to about 30 feet underwater, the bag was pressing up against the camera to the point that the controls were inoperable. The AF drive wasn't strong enough to rack the lens out against the pressure of the bag. The few snapshots produced in this matter were of substandard quality and, with a 20mm lens, there was pronounced vignetting from the housing (example at right).
Why Wide-angle Lenses Are Important
Now that we're deep underwater, let's talk about fundamentals rather than gear for a moment. One fundamental fact is that water magnifies. Thus you end up needing a wider angle lens than you thought. A 20mm lens on a full-frame digital SLR or 35mm film camera is not especially wide for underwater use.
If you have a longer lens, why not just back up? The problem with backing up underwater is that water tends to absorb red and yellow light. The more water between your subject and your lens, the bluer your subject will be. If your light source is on-camera (i.e., if you are using a flash), every extra foot of water between you and the subject addings two feet worth of bluing (one as the light goes from the flash to the subject and one on the way back to the lens).
Underwater photographers are thus very fond of very wide lenses and very powerful flashes.
Back to the Gear: the Rigid Housing System
If we don't like the plastic bag idea, what about going back to the rigid plastic housing idea that works so well for digital point and shoot cameras? We would need a housing custom-designed to enclose a digital SLR body. Then we would need some kind of extension matched to any particular lens that we might mount to that body. Then we would need some way of extending the enclosure to surround an attached electronic flash. Maybe we would want to have an off-camera flash connected via an underwater cord. Sound complex? It is, but it works and is the kind of system that most professional underwater photographers use. The oldest and most popular brand of underwater housing is Ikelite.
The Classic Nikonos System
For several decades, Nikon produced a line of flexible cameras that were inherently waterproof and pressure resistant. The most popular model was the Nikonos V. This was a rugged little rubber-coated body that took interchangeable lenses in 15, 20, 28, 35 (standard lens; works above water too), and 80mm lengths. The camera gave you aperture-priority or manual exposure control with center-weighted TTL metering. Optics and image quality are excellent. It was a real camera that you could take into the shower or down on any SCUBA dive.

The Nikonos V had a fairly unfriendly user interface for a camera that was designed for people breathing a limited air supply. To focus, you flip the camera over and stare at the front. Then you turn a dial until the correct distance is indicated. Then you flip the camera back over and take your picture.
Nikon fixed all of this with their Nikonos RS SLR, introduced with great fanfare in 1992. From the feature list, it looked basically like a water- and pressure-proof Nikon land SLR. Everything was automatic if you wanted it to be, the viewfinder offered super high eye relief (since the user was presumed to be wearing a SCUBA mask). There was an amazing 20-35 zoom lens and a tempting macro lens.
Warts? The Nikonos RS was priced at approximately $10,000 for a system, much more than a housed SLR. The camera would flood and require expensive repairs, which Nikon invariably blamed on user carelessness, despite the fact that these same people had been using the Nikonos V for many years with no problems. One photo.net reader who sold his said that what he hated most was the lack of neutral buoyancy: "I would hand the camera to my wife and then have to adjust my BC; I don't want a camera that becomes part of my weight system."
Nikon discontinued the RS system in 1996.
Nikonos V Gallery
Here are some snapshots from Hawaii with a Nikonos V and the standard 35mm lens.

Is it all worth it?
One of the best moments of my life was snorkeling in Kealakekua Bay on the Big Island of Hawaii. This is the bay where Captain Cook was worshipped as a God and subsequently stabbed to death by Hawaiians in 1779. I was about 1/2-mile out in the bay, drifting and look down at three reef sharks, each about six feet in length. They swam off suddenly and I looked up to see that a school of dolphins, perhaps 60 in number, had entered the bay. They were 200 yards away and I started swimming toward them. By the time I'd moved 10 yards, the school was all the way down at the other end of the bay (1/2 mile in the distance).
I gave up.
To my immense joy, the dolphins started coming back. They were heading straight toward me, occasionally one would leap but mostly I just saw 20 dorsal fins out of the water at a time (the other dolphins swimming underneath). My joy eventually turned to fear when I thought that perhaps a direct encounter with 60 bottle-nosed animals traveling at 30 miles-per-hour would not be pleasant. At the last minute, when the dolphins were no more than 15 feet away, they dove about 10 feet underwater and swam directly underneath. Some of them rolled on their sides to get a better look up at me. I snapped their picture with a Nikonos V.
When I got the images back, I found that the dolphins were only faintly visible on film. My eyes had adjusted to the blue light, but the film did not. The contrast between dolphin and water, dramatic to my eye, was very subtle.

Must you have a camera with you?
If you want to be a great photographer, the general rule is that you should carry a camera at all times. Competing with Christopher Newbert or Norbert Wu is a tall order, however. These guys go into the water every day year after year and wait.
It is difficult to take decent photos on land. It is difficult to go down underwater with tanks on your back and get back to the boat or beach alive. Don't feel compelled to combine these activities, especially if you're going on a dive that is challenging for you. There is nothing wrong with enjoying the underwater scene while you're privileged to be on vacation and underwater.
by Philip Greenspun

Monday, October 27, 2008

Studio Photography

Why go into the studio?

Studio photography is easy because you can get exactly what you want. Studio photography is hard because you can get exactly what you want.

A 14mm perspective on a photo studio

Soft light, hard light, hair light, background. Everything is under your control. If you are a tremendously creative person who knows how to use studio equipment, you'll get wonderful results. If you are uncreative, you'll have very flat and boring results. If anything is wrong with the lighting balance or exposure, you'll have nobody to blame but yourself.


Rent or buy?

Most big cities have good rental studios that come complete with lights, backgrounds, and often assistants. This is the way to go if you have a big budget and know exactly when you want to shoot. Having your own studio, especially at home, is great for spontaneous work and also because you can take some of your equipment on location.

Ceiling or floor?

Handstand

Decide whether you want your studio to be floor-based or ceiling-based. A floor-based studio means that you have lightstands for the lights and background supports for the background. All of these supports are very lightweight because they are designed to be portable. You'll be treading very carefully and/or you'll be knocking things over.

In a ceiling-based studio, you mount background rollers on the ceiling and a rail system that allow flexible positioning of lights anywhere within a rectangular area. A ceiling-based studio costs about $1000 more than a floor-based one, but is a much nicer place to work since you don't have to worry about knocking lights over.

The coolest part of any rail system is the pantograph light support. These pull down from the ceiling and are cleverly counterbalanced so that they just stay wherever you leave them. You just grab a light and move it up or down an inch and it stays there. Pure mechanical design magic. As far as I know, the Manfrotto Skytrack system (my personal choice; explained at www.manfrotto.com), a FOBA system (imported by SinarBron), and the Calumet system (www.calumetphoto.com) are the only rail systems available in the US.

The Lights

Decide what format camera you'll be using. Bigger cameras require smaller apertures to get adequate depth of field and hence more light. Decide how big your subjects are going to be. Head-and-shoulders portraits require much less light than automobiles.

To learn about hot lights, read one of the many good books written for cinematographers on the subject. With flashes, 500 watt-seconds is sufficient for digital or 35mm photography of people at full-length. The smaller strobe systems also work for 4x5 view camera photography of tabletop subjects. Most serious studio photographers start with about 2000 watts-seconds, which is adequate for 4x5 photography of large subjects, and will rent another pack if they have to light something huge.

Sunlight

If you have any windows in your studio, you might be able to use the sunlight coming in. The color temperature of sunlight varies from about 2000K at sunrise to 4300K in the early morning to 5800K at high noon in midsummer. [Note: the sun streaming into a window is different from what you get if you take your subject out into the open. "Daylight" is a combination of sunlight (around 5500K) and skylight (approx 9500K), averaging to around 6500K in the summer. Clouds or shade push the color temperature much bluer, up towards 9000K, though an overall overcast is usually 6000K.]

Hot Lights

Once you know how much light you need, decide whether to go hot or cold. "Hot lights" are tungsten or Metal Halide Iodide (HMI) lights that burn continuously. The big advantages of hot lights are

  • you can always see what you're going to get, even if you mix with ambient light. You don't need Polaroid tests, fancy meters, and a good imagination.
  • you can use hot lights with movie, video, and scanning digital cameras

Not too many still photographers use hot lights, though, because they have the following disadvantages:

  • heat. Thousands of watts of heat that make the photographer sweat, the models sweat, and the props melt.
  • tungsten color balance. Kodak makes some nice tungsten color slide film but if you don't like it, you'll have to filter your lights and lens like crazy to use your favorite color films.
  • limited accessories. It is much easier to control a light source that isn't hot enough to light paper on fire. You can experiment with electronic flash without burning your house down. With hot lights, you must make sure that your diffusers, soft boxes, umbrellas, etc. can handle the heat.

HMI lights are mercury medium-arc iodide lights that burn at a color temperature of between 5600K and 6000K. They produce about 4X the light of a tungsten bulb with the same wattage because less energy is wasted as heat. Also, you don't have to waste energy and light filtering to daylight color balance. That said, if you get yourself a 36,000 watt Ultra Dino, you won't exactly be shivering in the studio. The smallest HMI lights seem to be about 200 watts.

Cold Lights

Josh Hilberman

"Cold lights" are electronic flashes, much more powerful than the ones on your camera but basically the same idea. Studio strobes come in two flavors: monolights and powerpack/head systems. The business end of both is the same, a flash tube surrounding an incandescent bulb. The incandescent bulb, usually around 100 watts, is the "modeling light," used by the photographer to judge lighting effects and ratios. These aren't very effective if the ambient light in the studio, e.g., from windows, is high. In the old days, most photographers would burn a few Polaroids to make sure that the lights are properly set. In the digital era, the easiest way to preview is with a digital camera directly connected to a computer, with each new exposure displayed on a big LCD monitor.

A monolight has a wall outlet on one end, a flash tube on the other, and a big block of capacitors in between. These are nice for location work because you don't have have a lot of cables running around. Using several monolights together isn't as much of a problem as you'd think because (1) good monolights have a 4 or 5 f-stop output adjustment control, and (2) most monolights have a built-in slave so that when one fires, they will all fire.

In a powerpack/head system, you have one big heavy capacitor-filled power pack and a bunch of relatively lightweight heads connected by high-voltage cables to the powerpack. You can adjust the lighting power among the heads and also the overall light output. These are the most flexible and most commonly used studio flash systems. Flash power is specified in watt-seconds (joules), somewhat confusingly abbreviated as "w/s".

Choosing a brand of studio strobes is a similar process to choosing an SLR camera system. If you buy the wrong brand, you may have to scrap your entire investment as your ambitions grow. In the world of monolights, Sunpaks are cheap (around $300 each for 500 w/s or in a 1600 w/s kit), have been around for a long time, and allow stepless power adjustment over a 5 f-stop range. Sunpak makes an interesting combination monolight/softbox called a DigitFlash that is probably ideal if you're sure that you never need a hard light. If you feel like spending twice as much money for the same power output, there are monolights from a lot of professional strobe vendors that will possibly accept a wider variety of light-control accessories.

George

In powerpack/head systems, Novatron should be the cheapest system you consider. Anything cheaper probably won't work in the long run and won't fit any of the standard light control accessories. Novatron sells kits that include cheap umbrellas and light stands in a big plastic case. You can use these to go on location as long as you're not worried about some big-time professional walking by and calling you a girlie-man because you don't have Speedotron. Example kits range from 240 w/s, two heads to 600 w/s, three heads. The main problems with Novatron are that (1) the packs only have adustable power output over a 2 or 3 f-stop range, and (2) the heads won't take more than 500 or 1000 w/s of power.

If spending 2-4X as much money per w/s is acceptable, you will no doubt be very happy with Speedotron Black Line, Norman, Dyna-Lite, Broncolor, or Calumet systems. These allow you to pump 2000 or 3000 w/s into a single head, adjust over a 5 or 6 f-stop range, have more powerful modeling lights, and are presumably more reliable in heavy use. Many of these systems offer interesting zoom heads that allow adustment of the light cone angle.

Warning: there is a brand of mail-order flash called White Lightning (Paul Buff) that is sold as X watt-seconds for N dollars. These supposedly aren't such horrible flashes but the watt-seconds figures are absurd. The true output is something like X/2, which means that their monolights aren't any cheaper than other cheap brands.

Note for high speed photography: Studio flash systems generally take between 1/200th and 1/1500th of a second to dump out their light. This is fast enough to freeze much motion but won't stop a bullet or give you a perfectly sharp splash. Studio strobes are designed for relatively long illumination times because color film actually suffers some reciprocity failure at the very short exposure times of on-camera flashes that aren't working hard. In other words, Kodak and Fuji don't guarantee that you'll get correct color balance at 1/50,000 of a second because the red, green, and blue layers of the film respond differently to being illuminated for so short a time. If you want to do high-speed photography, your options are (1) use an on-camera flash set for 1/32nd power, or (2) get a studio strobe system specifically designed for stop-motion capability (and add a trigger system from Kapture Group).

Light Control

M and Ms.

Whatever lighting system you get, make sure that it is reasonably popular. Otherwise, you won't be able to get any accessories to fit. You need to be able to control whether the light is hard or soft. Hard light is generated by a small and/or far-away light and results in strong shadows. Examples of hard lights are the sun (not small but quite far away) and bare bulbs. Soft light is generated by a large diffuse light and results in shadow-free images because there are many paths from the light source to the object. Examples of soft light are an overcast sky, a north-facing window close to the subject, a bulb reflected off an umbrella placed close to the subject.

Another dimension to control is diffuse/specular. A diffuse source contains light on many different angles whereas specular light is organized in parallel rays. Specular light doesn't bounce around the studio filling in shadows and lowering contrast, spilling onto the background, etc.

Old-time photographers relied on silver umbrellas to get a somewhat softer light source. With white translucent umbrellas, you can use them like a silver umbrella and bounce off them (losing about 1/2 the light, which will go through and away from your subject) or push the light through them, which results in slightly harder light with the same 1-stop loss. However you use an umbrella, you'll generally get a diffuse light source.

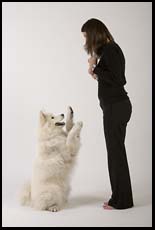
The modern religion is the softbox, a reflector-lined cavity covered with a white diffusion fabric. The best of these, e.g., the PhotoFlex MultiDome, allow you to remove the front fabric to get a "sort of hard" light, to place or remove an interior baffle to get a "slightly less soft" light, and to warm up the color of the light with a gold reflector. Because softboxes surround the light head, you lose much less light than you would using white umbrellas. Note: the M&M image at the upper right was done with a softbox.

Some photographers put a big grid over the softbox to create a large specular source. Louvers create the same effect but only on one axis. An inexpensive honeycomb grid will turn a strobe head into a specular light source, albeit not a very large one. Photographers who use these tend to use many, "painting a scene" precisely with pools of light. Strobe head grids are $50-75 each or sold in sets with different light angles for about $200.

Snoots sit over a light head and turn it into a very small light source. These are usually used for hair lights. You can stick a small honeycomb grid over the snoot to tighten up the cone of light thrown by the snoot and also make the light more specular.

Barn Doors are black metal flaps that sit around a strobe head and keep the light from going where you don't want it to go. This is Hollywood technology from the 1920's. If you really want to control the angle of the light cone thrown by your head, you should probably get a zoom head or a bunch of grids.

Reflectors are really too general purpose to be called "studio equipment" but they are essential studio items and, if cleverly used, can eliminate the need for additional strobe heads. A favorite of mine is the PhotoFlex Litepanel, which is a huge sheet of gold/silver reflector, white diffusion fabric, or black light absorber in a plastic frame. You can light through this and turn it into a huge softbox, bounce off of it to bring the contrast ratio closer to that magic Kodak 3:1, or take it outside and have an assistant hold it to filter the sun. Another essential item is the disk reflector (e.g., Photoflex Lightdisc) which stores compactly but springs open to a large round reflector with a steel frame. I usually buy them white on one side, gold on the other.

The most important word in studio light control is "gobo". Hardly anyone knows what it means, but you can't beat the mysterious sound. It actually is short for "go between" and refers to anything that you stick in between the light and the subject to cast a shadow, diffuse the light, or whatever.

More: see the Photoflex Web site for a wide range of standard professional products. If you really want to understand the art of lighting, read books written for film makers and also look at old black & white movies (before they had color, they used lots of interesting gobos to add shadow patterns on white walls and other boring surfaces).

Flash Triggering

With hot lights, there is no need to worry about triggering the lights; they're on all the time. With strobes, the camera has to tell the strobes when to fire. This is traditionally done with a sync cord. Sync cords come in many lengths and are available coiled or uncoiled. The one thing in common that they all share is that someone will trip over one and probably pull something expensive down onto the floor. It is much better to use a wireless trigger of some kind. I have had good luck with the Wein infrared trigger system, which consists of a small on-camera hotshoe-connected flash with a filter over the front that only passes IR light. The other half of the kit plugs into your strobe powerpack and waits for the IR pulse from the on-camera unit, then triggers the flash. If you want to go fully wireless, you can get a mini Wein trigger that plugs into a flashmeter.

There are various radio slaves (e.g., Bowens, Morris, and Quantum) that also perform this function, possibly better in a large studio or outdoors.

Flash Metering

Only a handful of cameras, e.g., certain Rolleis and Contaxes, have been manufactured with the capability of metering flash exposure with a through-the-lens in-camera meter. The standard practice of studio photographers is to use a handheld flash meter, a device that measures ambient light, light ratios, and calculates how many pops of a lower-powered studio strobe system you'll need to shoot at f/64 with your view camera. Even in the digital world where instant previews are available at no cost, a handheld meter is useful for determining whether or not the image is too contrasty to print easily.

Almost everyone uses a flash meter in incident mode. You start by connecting the meter to the strobes via a sync cord or a wireless trigger. You put a white diffusion dome over the meter and hold the meter in front of the subject's face, with the dome pointing back at the camera. You push a button on the meter, which triggers the flash. The meter then reports the appropriate f-stop to use. This gives you a reading that is independent of the subject's reflectance. In other words, if the subject is white the meter doesn't get fooled into thinking that it is a brighter light; if the subject is black, the meter doesn't recommend opening up two more f-stops until the subject is rendered as though it were 18% gray.

Though nobody was ever able to figure out how to use it, the standard professional meter for many years was the Minolta Flashmeter IV. Some of the truly technically adept were able to figure out what half of the buttons and switches do. Minolta rewrote the user's manual because nobody could understand the first one. Then they replaced it with the better/simpler Auto Meter VF and Flash Meter VI. Then they decided that they couldn't compete with Canon anymore and abandoned the photography business. Now we are back to Gossen and Sekonic, two companies that don't do too much besides make meters and therefore are able to concentrate on making good ones.

The Gossen Luna-Star F2 is a great example of the modern flash meter. It takes one standard 9V battery that you can buy anywhere. It only has six buttons and their functions are obvious. Without reading the manual, I was able to use all but one of the meter's modes within 60 seconds of putting in the battery. 99% of what you'd need to know from the manual is printed in four sections on the back of the meter. The meter is great for computing lighting ratios. You press the measurement button once to take a snapshot reading. You press and hold it while sweeping the meter around a scene and the Luna-Star F2 draws you a graph at the bottom of the display of the contrast range (e.g., f8-f16). Every time take a flash reading, the meter also shows you the ambient reading with an unobtrusive little bar on the same graph. Unlike the Minolta meters, you don't need a "reflected attachment" and an "incident attachment." The naked meter works to measure reflected light. Add a plastic incident piece and you can measure incident light. Add a little viewfinder and you've got a 5 degree spot meter. It is a great design and smaller than competing products. Nit: It only meters down to EV -2.5. That's a couple of stops less light than most pro SLRs but not as good as some other handheld meters.

Sekonic supposedly makes some great meters too, but I haven't tried them.

The Background

Feet.

The basic professional background is seamless paper. This comes in rolls 53", 107", and 140" wide. The 53" size is too confining for photographing people, leading to stiff poses and nasty little slipups where a corner of the frame is not covered by the background. On the other hand, the 140" size is not necessary most of the time, which is why it is only available in a handful of colors. The 107" width is about 9 feet and that's a good size for most people. A roll costs about $30 and a good starter set would be white, "studio gray", and black. Colored seamless, or as we refer to it here in Cambridge, "seamless of color", tends to give pictures a Sears portrait studio look. Manfrotto makes a nice "Auto Pole" system that lets you mount several rolls of seamless conveniently (a few hundred dollars; can even be motorized).

For location work, Photek's Background-in-a-Bag system is kind of nice. These are big sheets of what looks like crushed velvet that you duct tape up against a wall. They fit into a included gym-bag.

Muslin is another standard studio background, available from amazon.com. If you want some color in a portrait background, muslin will look a lot better than colored seamless.

Camera Support

Obvious Answer #1 to the question of camera support is "Why do we need one? We're using a lightweight single-lens reflex camera and the strobes will freeze any camera shake?" Obvious Answer #2 is "Use a tripod."

Why use camera support? With hot lights, for maximum sharpness you need to ensure that the camera doesn't move during the exposure. With larger heavier cameras, a camera support will allow you to concentrate on composition rather than muscle fatigue. If you're attempting to be creative, a camera support enables discipline around camera position.

A tripod seems like the obvious way to support a camera, but there are much better options in the studio. A tripod is inconvenient. Since using the center column to adjust height reduces stability, you have to adjust all three legs to raise or lower the camera. You can't usually get really low or really high or really hanging out over your subject with a tripod because the legs get in the way.

Part of the reasons that tripods have so many shortcomings is that they are engineered to weigh less than 250 lbs. If you want the most stable support for a fixed weight, a tripod is the right design. Once you accept the idea that a camera support can weigh more than the photographer, there is more freedom of design and you'd probably come up with a Studio Stand. This is basically a heavy rigid single column off which you hang crossbar arms off of which you hang tripod heads off of which you hang cameras. There are wheels on the bottom that you can lock. The columns come between 6 and 12 feet in height and prices range from $350 to $3500 depending upon features and stability. Arkay, Davis and Sanford, Delta, Foba, and Manfrotto are the most common brands.

Light Painting

If you get bored with traditional studio work, try painting with light. If your studio can be completely darkened and your subject will hold still, the simplest way to do this is with a flashlight. Turn out the lights, open the camera shutter ("B" or "T" mode on a single-lens reflex), and walk around the subject and shine the flashlight on those parts of the subject that you wish to register on film. To make part of the subject brighter on film, hold the flashlight on that part for more time.

Light painting opens up a world of possibilities that are not available in the world of near-instant exposure. For example, for infinite depth of field, simply keep refocusing the camera as you light parts of the subject that are at different distances from the lens. To make just a portion of the subject diffuse, put a stocking over the lens while you're painting that part.

The Hosemaster was a $5000 fiber-optic light painting system that was all the rage when it came out in the early 1990s. Calumet took it over sometime in the late 1990s, but seems to have discontinued the core system.

Light painting was laborious in the film days. The photographer would spend 15 minutes painting a scene on a Polaroid test exposure and then do it all over again for the final slide. You would think that digital cameras would be infinitely superior for this application. Unfortunately, digital sensors introduce noise into the shadows during very long exposures. Cameras and digital backs with large physical sensors, e.g., at the bare minimum a Canon EOS 5D (review), might work better for light painting.

Cool Stuff

You went into the studio to have fun. Now it is time to stock up on mylar, strange oils, dead flowers, interesting vegetables, and play. If you want to spend more money, there are lots of interesting ways to do it. Rosco makes a huge range of colored filters to stick in front of lights plus fog machines ($350-700) to add mystery. A wind machine (around $500) will give human subjects that active look. Trengrove artificial ice cubes and related products will help you do that Chivas Regal ad.

by Philip Greenspun